2015/11/30

Let's make something Mori-kei inspired! - take 3

This isn’t much for an update, but with this project I will try and cover as much of the progress as possible. A thing I’ve been very neglectful about in the past. Also it’s insightful, to some at least, how you go from your pattern to the finished piece of clothing.


Not really needing a lot of measurements for this one the patterns were fairly easy to draw. All I needed was to figure out how long I wanted the various parts to be.


The nightdress, consisting of an inner layer and outer layer and both will have frills at the hems and around the collar. There will be a snap in the back of the collar  to close it up with.


The bloomers made in one piece for each side. Revised the pattern a bit after as it was way too big, don’t know where my head was at.. Anyway, and the chemise at the bottom, debating whether it should have a row of small ruffles at the hem of it or not. Some flowery lace will make for the straps and a snap in each on the front to fasten them.


 Patterns cut out and ready to be transferred onto some fabric.


Everything cut out, the nightdress and sleeves, the chemise and bloomers and up top the fabric for all of the ruffles, or, nearly all of them, will have to cut out some for the chemise if I do decide to put some on there.

2015/11/27

Let's make something Mori-kei inspired! - take 2

So, in wanting to make something kinda mori kei inspired I thought I’d start of by sewing the night dress. Easy peasy right, just gonna sew this thing together and be done with, yeah, no.


Off to a brilliant start, here in the middle of sewing the, what are those even called, I don’t even know myself, but it’s where the buttons will be all down the front.


Yes, yes, looking good..


Seeing how it would fit the little guy and like a hand in a glove to be honest. Sewing the sleeves up a bit to the right, purposely made too long.


Adding a bit of lace here to the sleeve.


And found some lace to use for the collar and again some flowery lace to go down the front


A little mockup of how it was going so far


And after having sown some elastic onto the cuff


having sown it all together here only needing to hem the bottom of it.


And added some lace and this doesn’t much look like a night dress of any kind to me now…


Yeah, looks more like a jacket, though I like it and have in mind tea dying it, making it a nice brown colour to go with his little outfit instead of being in stark contrast with it. Going for a fall look anyway with dark warm colours, all except the shirt, but that’s all for it not to get one big dark smear.


And here is a little drawing of what I have intended to sew after my little mishap. A chemise (not see through tho) long bloomers and a night dress with a whole lot of ruffles at the neck and hem of the dress. Will be fun getting all of this together!


TBC

2015/11/22

Support the Artists


There are no and never will be any valid reason for people to knowingly buy recasts. It hurts the artists, it hurts the hobby, it hurts the community. It's a purely selfish act. Please do the right thing. If you really truly love these dolls, show you mean it, support that artist by buying their creations. Their livelihoods and the continued existence of the hobby depends on it.

Support the Artists!

~

Dolls: Guiliano, SOOM TeenyGem Feny, Jamie, DollsBe Grape
Clothing: FectDoll, eBay, SOOM
Eyes: DollShe, unknown
Wigs: ForMyDoll
Face-up: Me

2015/11/20

Let's make something Mori-kei inspired!

Meet the lucky victim!


Fabian, who hasn’t had a proper set of clothing since, well, since he arrived.. >> So, going hunting for some fabrics to make him something to wear This was what I returned with.


I’m going to be sewing him a nightgown, a waistcoat, a shirt and some trousers along with some socks.


The waistcoat will be made of a deep purple velvet and going to look for some fabric for the lining. It will be decorated with lace and have two pockets in the front.
The shirt will be made of this flowery cotton fabric with big puffy sleeves ending in ruffled lace to be closed with snaps most likely. The collar will be ruffled lace and there will be lace trimmings all the way down the middle of the chest and most likely it’ll get closed with snaps.
The pants will be ¾ long, puffy legs and contemplating whether they should, as the shirt, have ruffles at the hem of the legs or if it should be more simplified. I will see once it’s coming together what I’ll do in that department


The nightgown, well, simple really. It’s going to be about halfway down his legs, the sleeves will be big and puffy, lace all around the collar, the cuffs will be gathered with some elastic as one can see on my hasty drawing up there and I’m not sure if there will be any lace or anything at the bottom of it yet. I really need to see how it will look as it comes together to determine things.

TBC

2015/11/18

SD sized ball gown - WIP

This is an old project of mine having been on hiatus for about a year now. Decided I would kick myself in motion again and finish what I started.

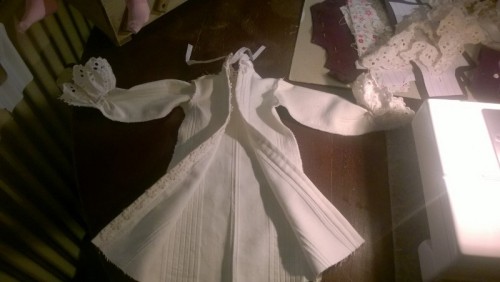
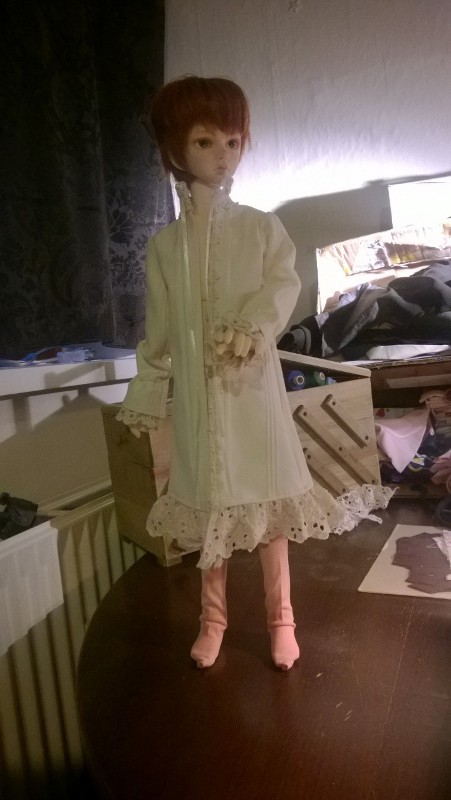
Back then I got quite a bit of sewing done for the main dress, if one could call it such. The list of garments were as follows: socks, long bloomers, chemise, crinoline cage, petticoat, over skirt, jacket, spoon bonnet, purse and a parasol.

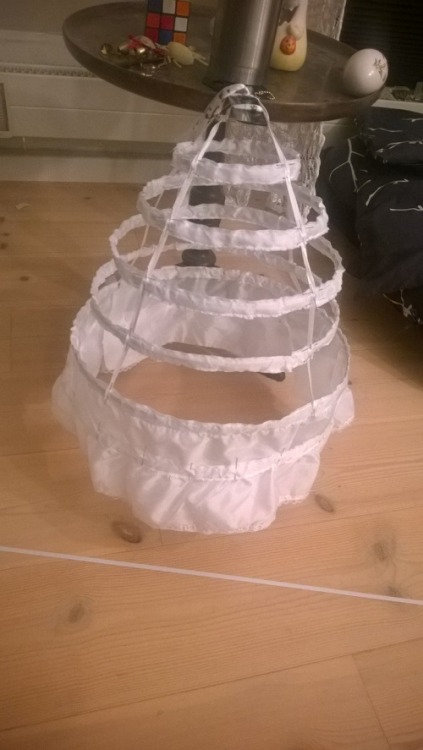
The crinoline cage I had already put together, didn't get pictures of the in between process of putting it together but can say as much that it is steel boning for the hoops and they are all adjustable by an inch or so.


There I had yet to sew the hoops onto the string and ended up taking it little over an inch in as it was far too long.


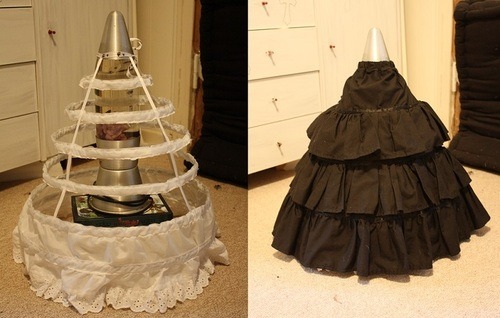
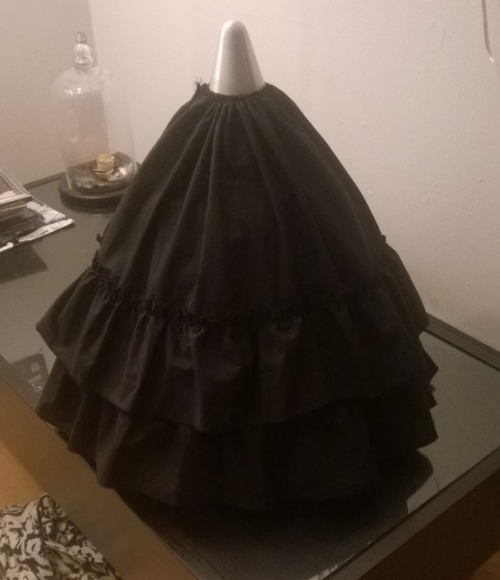
I was really bad at shooting progress pictures which really is a shame, but yeah, finished crinoline on the left and the petticoat on the right.
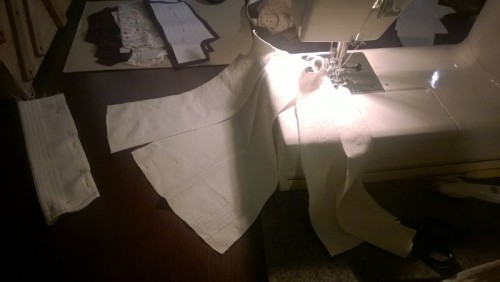
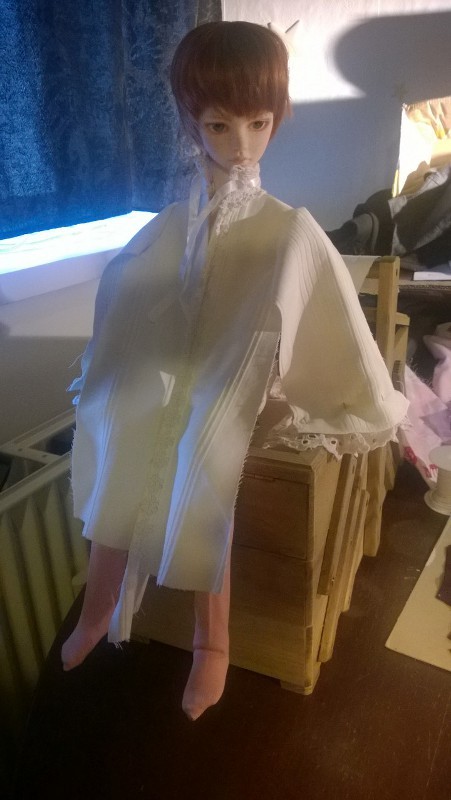
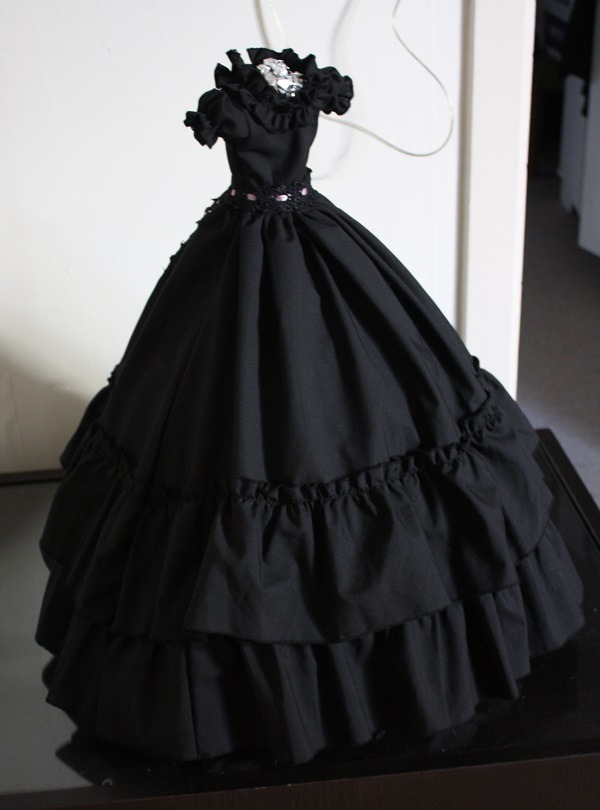
Having finished that part I went to cutting out fabric and sewing together the overdress and, again, I didn't get progress pictures of that either.


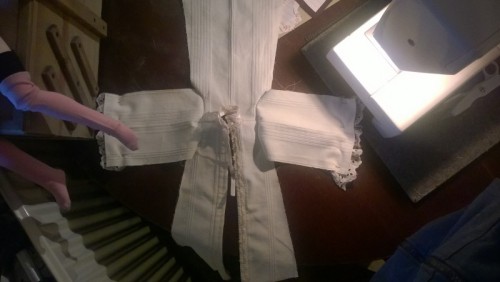
Here it is all sown together, just needing the top and a zipper in the back.

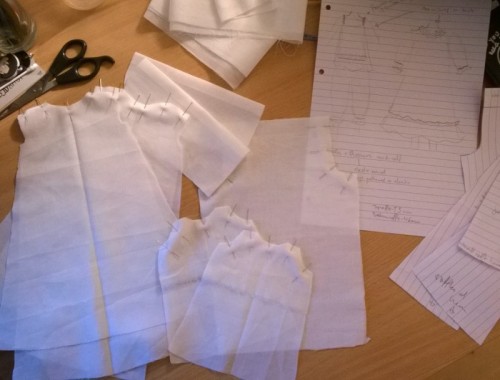
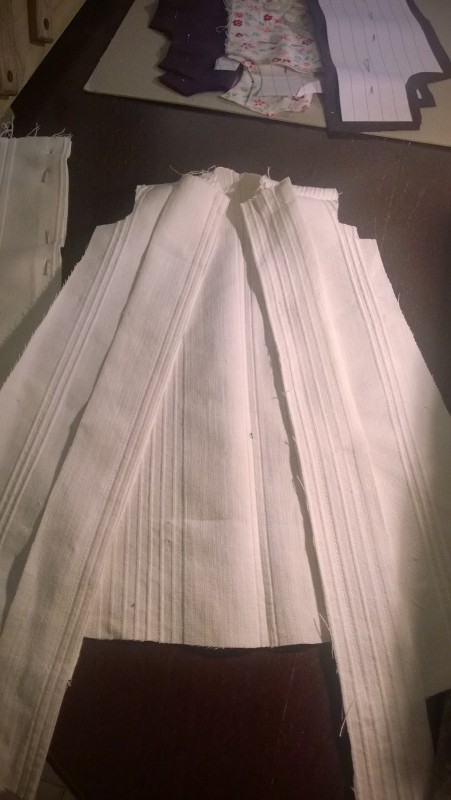
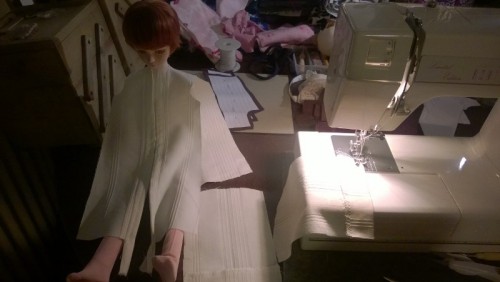
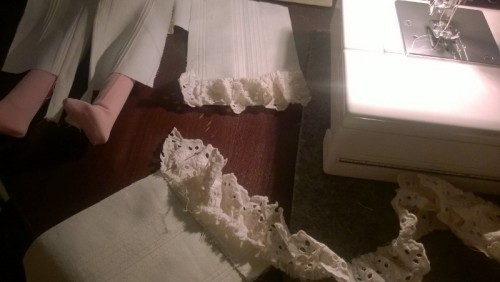
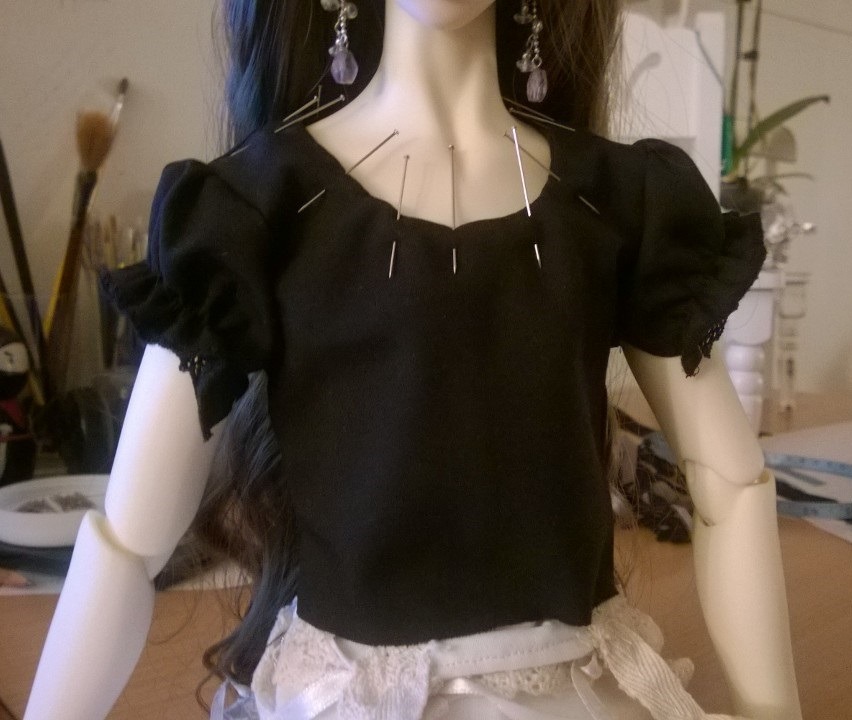
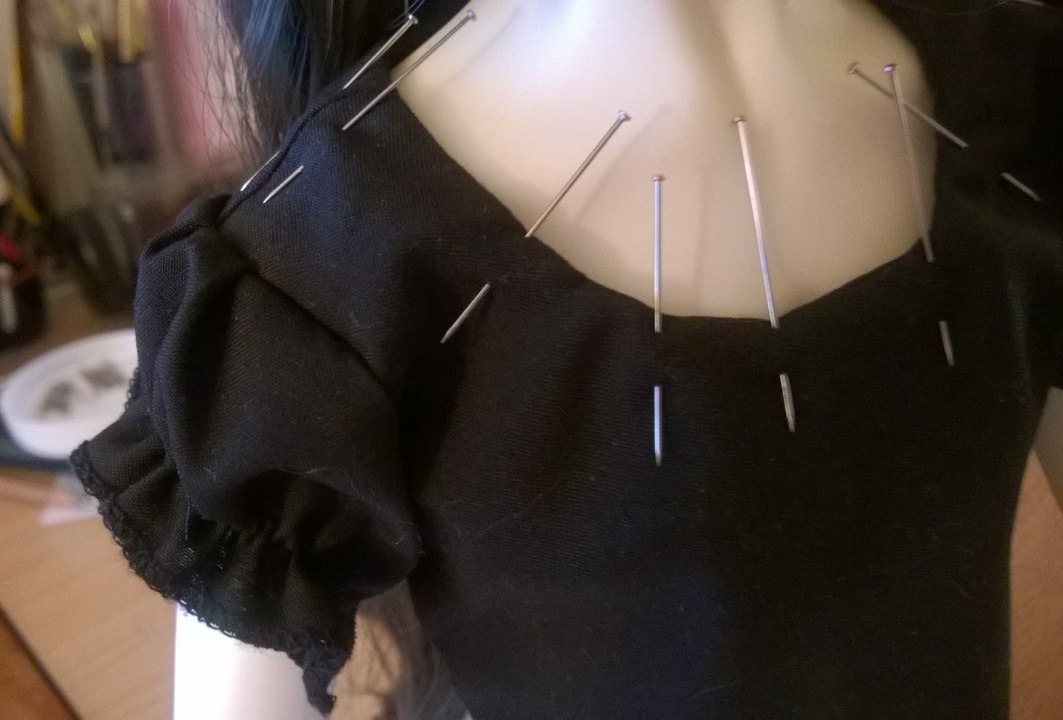
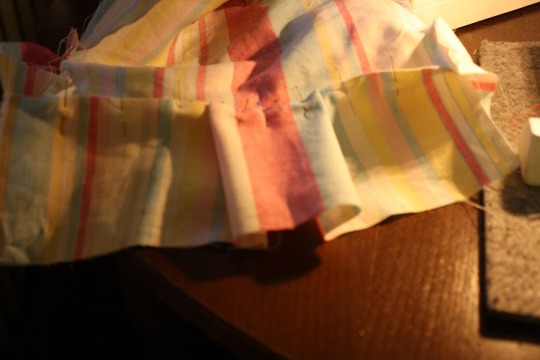
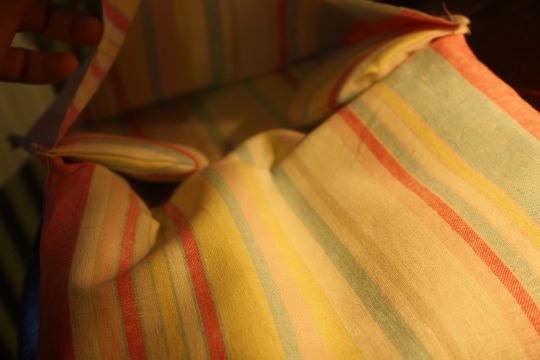
Actually did get a few pictures of the progress of the top of that skirt back then, granted it isn't much, but it's something.


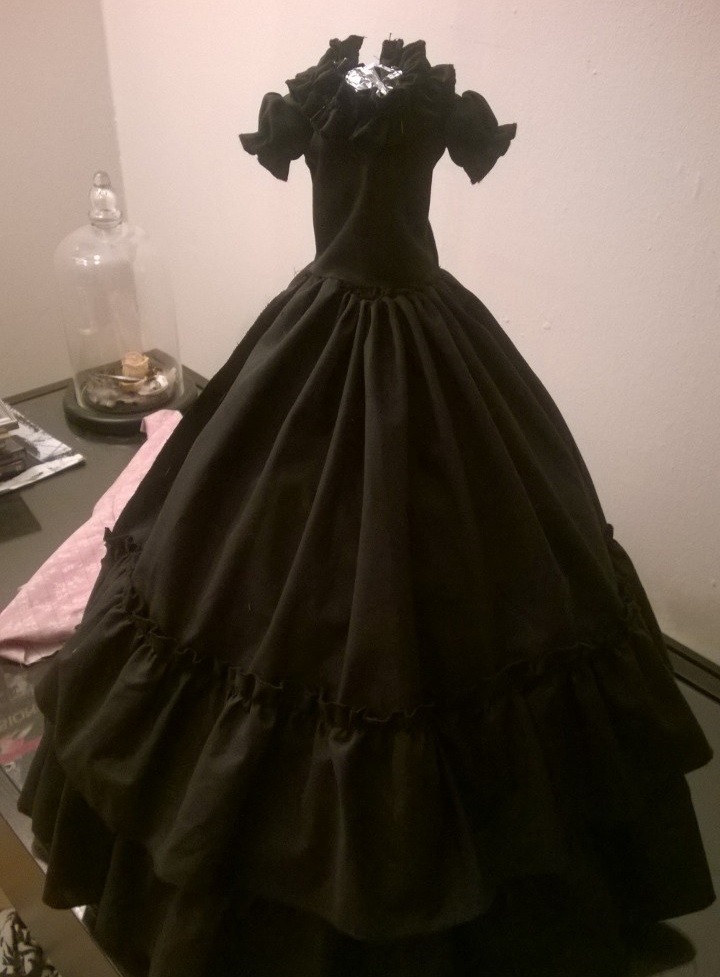
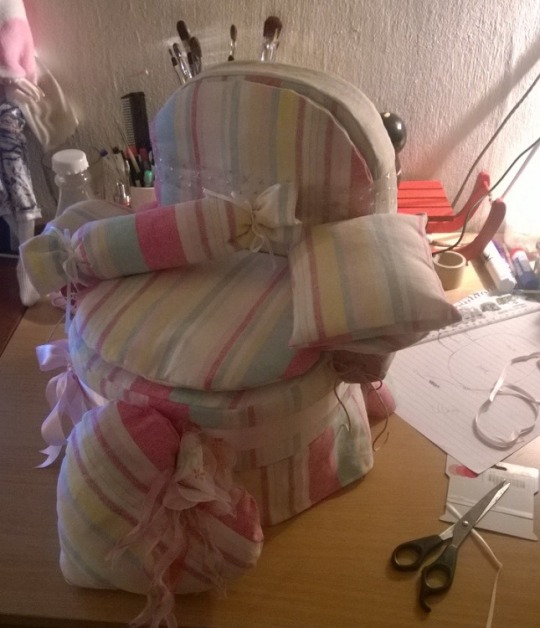
Later added ruffles to the hem of it as it looked barren and just to get a feel for how it would look attached to the skirt I made a mock up.


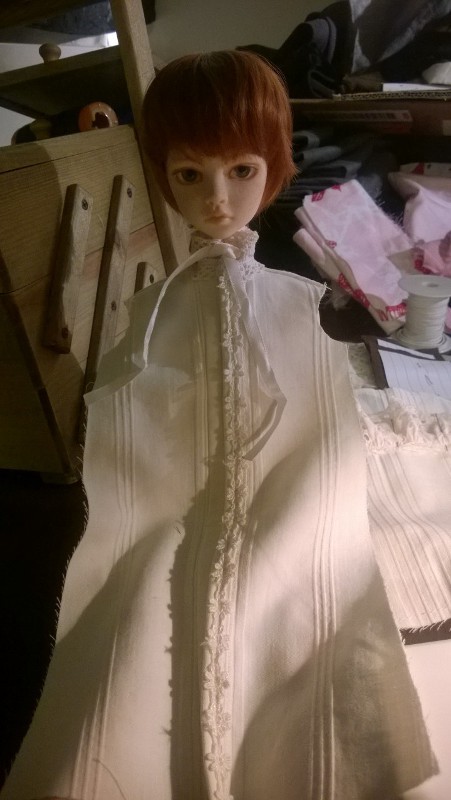
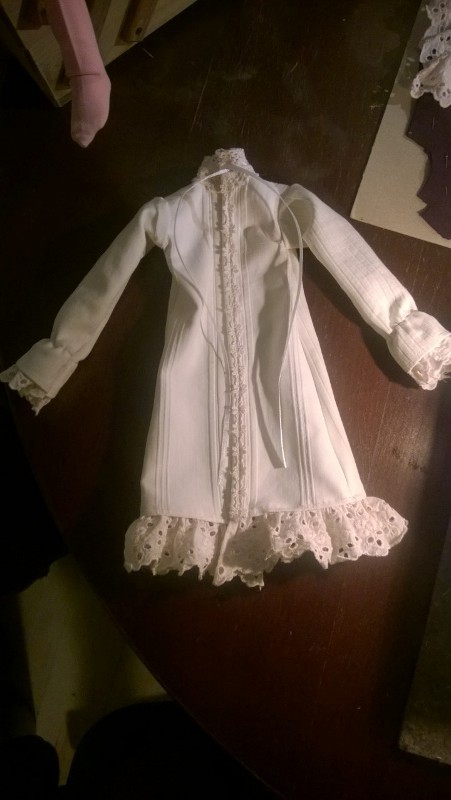
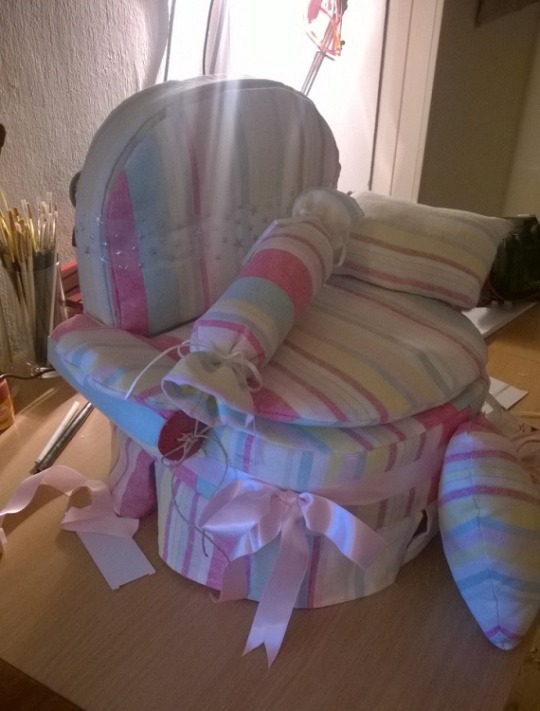
It actually got to look quite nice once it got sown together properly.


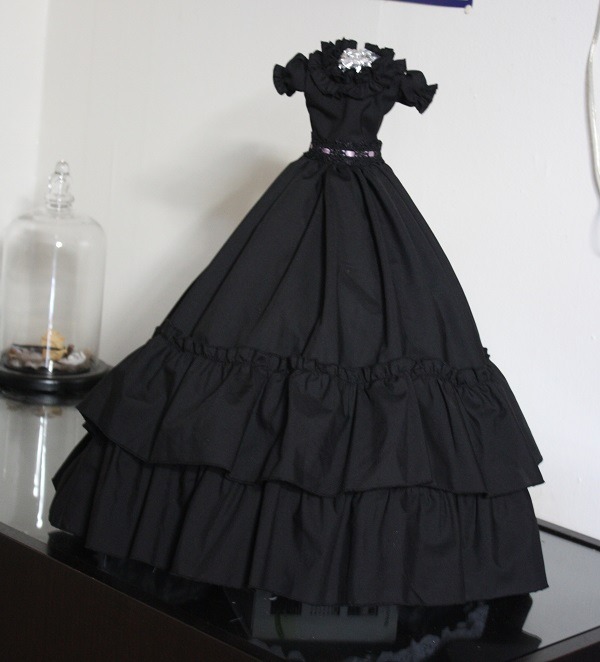
The lace and ribbon detail around the waist did get to be sown onto the dress in the end, can always remove the ribbon if it should come to be in the way of things.

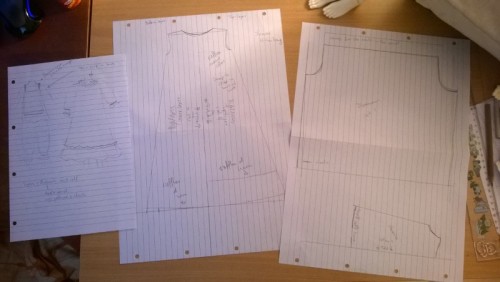
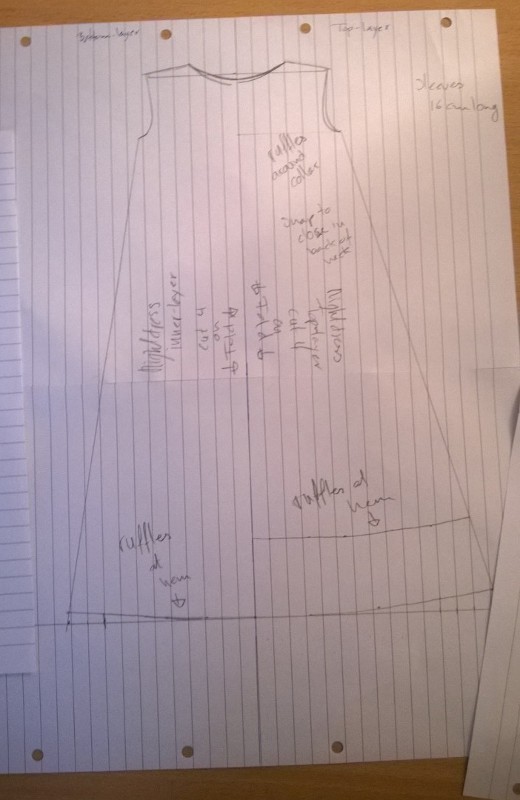
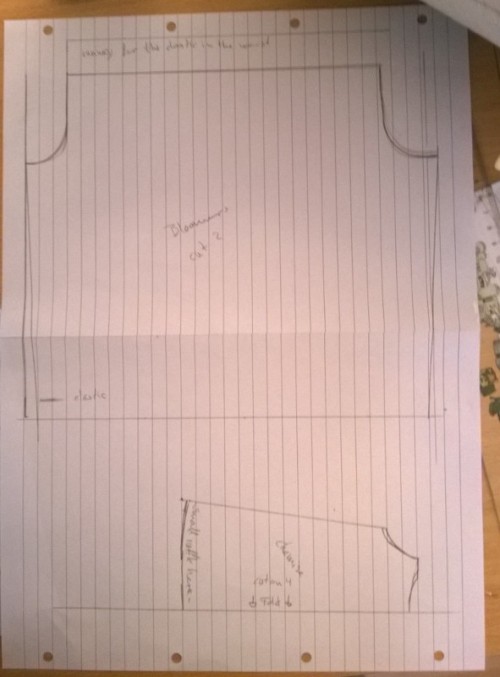
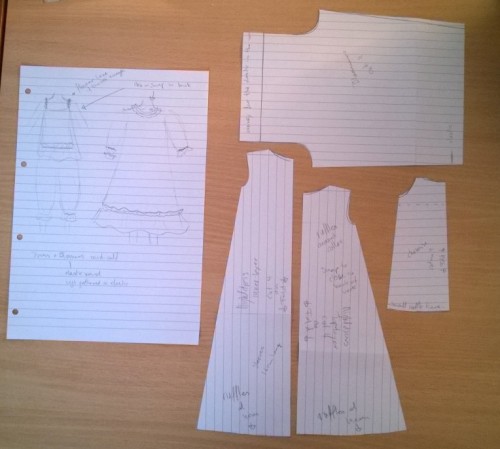
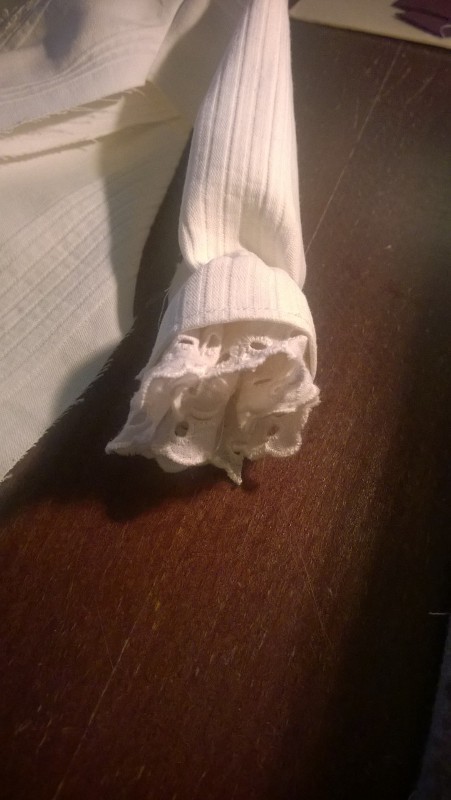
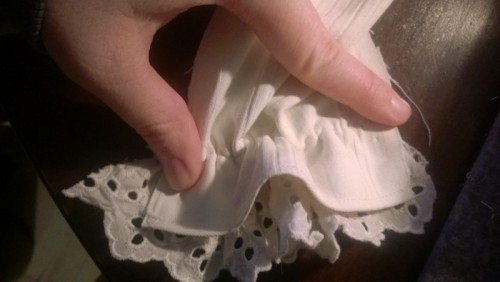
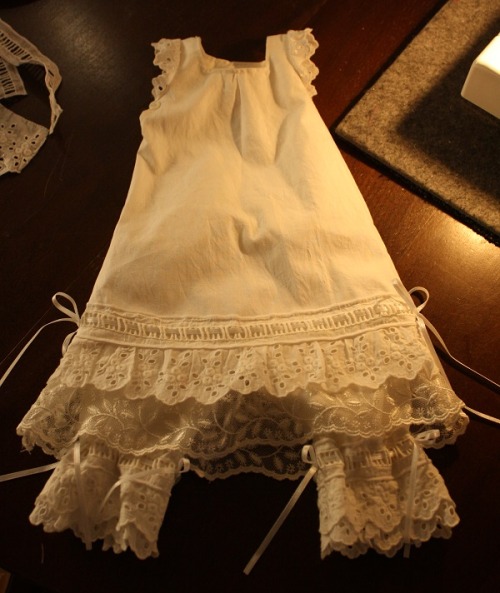
So, that out of the way I started drawing patterns for the bloomers and chemise. I didn't have a specific pattern in mind so just drew what came to mind and went crazy finding lace and ribbons to really doll it up with. Sadly no in progress pictures of this either, seems to be a recurring problem of mine with all of my projects, but of course I do have one of the finished outcome.


The bloomers are crotchless, meaning they aren't sown together all the way in the crotch.

This was where things grinded to a halt. I waited forever on some fabric in the mail and when it finally arrived I was busying myself with other things and this project was set on a longer-than-expected hiatus.

I have gotten new ideas for it in the meantime. Still going to sew a purse and doing a few minor changes to a parasol I bought on eBay by changing the cover fabric and decorating it nicely. For the dress I'm going to be adding long detachable sleeves in some black see through fabric, there will be a long sleeves bolero with puffy shoulders, and a bustle skirt with a corsage-like underbust being tied together with ribbon in the front
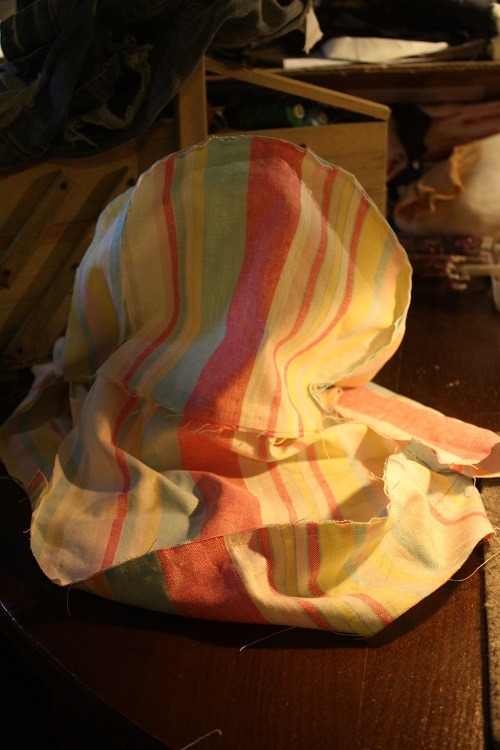
The fabric I've chosen to sew all of this from looks like this:


But before I even put scissors near it I will have to work on fabricating patterns for all of this and hopefully I will have enough fabric when all comes to all. Else I just have to put up an order for some more and at least the 1st ain't so far away.

I will try my best to cover some more of the in progress state of things and update you along the way.

TBC

2015/11/09

SD Sofa chair - finished!

The day we all waited for! Or, well, I at least did, with much anticipation and excitement! It’s done!

In all of my eager for sewing everything together I didn’t think of shooting pictures along the way really. Only ones I’ve got are these:


Of the upholstery having finished sewing it together


In the process of sewing the, lack of word for it, I call it the skirt onto the upholstery, all nice and blurry.


And the almost finished seating pillow, also nice and blurry.

Anyway, enough boringness, onto the fun ones!


Look at this beauty!


With pretty bows and plenty of comfy pillows


The buttons I chose not to glue onto the fabric and instead just have them tied with string. That will also allow me to take the upholstery off to wash it or sew a completely new one some day.

Anyway, that was it, hope you enjoyed and that I might have brought some inspiration to others. Do link me up if you decide to make something similar!

2015/11/01

Sofa chair project - update

Tiny update.


Look at that! Starting to really look like something and not just a bunch of cardboard and duct tape. Don’t know if I will paint the legs or just leave them be, though, would be nice to whip up some deep brown of sorts to cover up the fact that it’s just cardboard tubes. I’ll figure it out soon enough.

BO: DikaDoll Pan NS